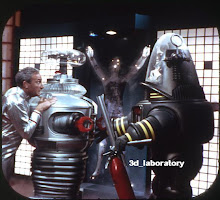
 Without a doubt the best production bubble I have seen has been Fred Barton's. It is nice and clear but thin and easy to damage. In addition, Paul Felski's bubble from "across the pond" is also very nice! It's good to have quality vendors that allows you a choice for parts. I got to meet Paul last year at ROBOCON 2007 and had the opportunity to look at his bubble from his B9 pictures. I chose Fred's since I am state side. Someday I hope to meet Fred as I hear he is an interesting character!
Anyhow, back to lessons learned....don't bring the bubble out until you are ready to install it. If you leave it out, curious hands, house keepers and other family members will make their way to it where they find out just how light and fragile it is so take it from me ...put it away in a safe, hidden place till you are ready to install it.
When you are ready to start drilling holes in the bubble make sure you "key" the bubble. Mark the front of the bubble with some blue painters tape. Make sure you tape/mark the front of the top and bottom part of the bubble.
Another thing I learned is that it helps to use a special drill bit when making the holes for the lower lid and brain cup holes. The drill bit needs to be made for plastic drilling (yes there is such a drill bit). Drill bit #40 and #50. You can get them at McMaster-Carr.com. When I received mine from Fred, I had to open up the center hole for the neck bracket (just a little bit). Take your time with this. Mike Joyce was kind enough to offer this procedure for fitting the bubble:
Carefully mark the location where you want the 4 holes on the bottom plate (I say four because the original had four.) Drill the 4 holes in the bottom plate slowly using a standard #50 drill bit.Tape the the bottom plate to the bubble using masking tape, etc. in the exact position you want it (centered). Be sure to mark both the bubble and the bottom plate "Front". Put tape on each, etc. Match drill the 4 holes in the bubble using the bottom plate as a guide and again use the #50 bit. Remove the bottom plate and enlarge the 4 holes with a #40 drill bit. Use a counter sink bit on the bottom plate as required for #2 flat head screw to set flush. Attach the bubble using four #2 x 1/4" screws. These are McMaster Carr part number 90006A077. The original used these small screws as well.
Stay tuned for our next episode: "Electronics of the B9. The inside story"


No comments:
Post a Comment