Thursday, November 22, 2007

Torso, Sound card and 12 CH RF relay remote

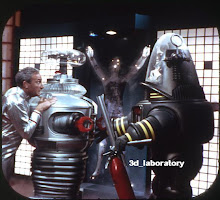
Here are a few additional shots of the Torso.
I am in the midst of making the teeth lights bezel and sub plate using the NKK switches (633-215kkw016b1jb-r0) from Mouser.com that rest behind the faux buttons. I will be using Craig's buttons and new laser cut bezel.. They are the best looking.
I took advantage of the down time this holiday(Thanksgiving) and wired up the CF3 sound card and Cold Fusion 12 relay Channel remote for remote control of sound and other functions. The beauty of this sound board is that I can change the SAN card for different situations or functions, have over 2000 sound files/phrases, etc per card and can execute macros and remote functions based on the push of 1 button or a series of buttons. This adds to the puppeteering necessary to simulate the on screen persona of our bubble headed booby!
What you see below is the Spektrum DX7 transmitter with the CF3 Sound card and (on top of it) is the Cold Fusion 12 Channel relay remote board. You can configure it and/or the CF3 to use NO or NC contacts switches . Latched or momentary.
The CF Sound card can take upto 49 contacts (which I updated mine to take). It is a very good system.

Wednesday, November 14, 2007

Torso, Vents and Microphone

Here is how the Replica torso is turning out so far. Note the Microphone in the Robot's claw. That Microphone is fully operational. I got it from Mike Joyce as he was cleaning out his old stuff. Apparently it was machined and made specifically for the B9 by a club member who is no longer active. It is beautiful and works great too!

Also ote the vents inside the torso. I used a combination of superglue on the bottom of the rail and plummers liquid steel epoxy putty on the top rail . The rails and vents are from Craig Reinbrecht. The vents move like glass!!!

What I need to figure out now is how to attach the metal vents and black cloth that goes behind the vents that will still allow me to open the vents fully for access to the various electronic boards and the torso attachments to the donut.

On a side note, please note the keying of the radar section below for the bubble lifter. This is essential for proper bubble lifter operation but more on that later...... (I have to keep you coming back for more) :)

Progress - Update Drive Section and Bubble Lifter

Well, its been a little while since I had some time to update this blog. So I thought I would start off with a few home movies. Enjoy.....
Look on You Tube for all of my videos for this build.